The Library
Inserting blocks
Inserting objects from the library can be done in a menu which pops up with the command SCADLIB, or clicking the button in the ribbon:

By clicking on the lowest item in a tree an icon menu will appear with the blocks:
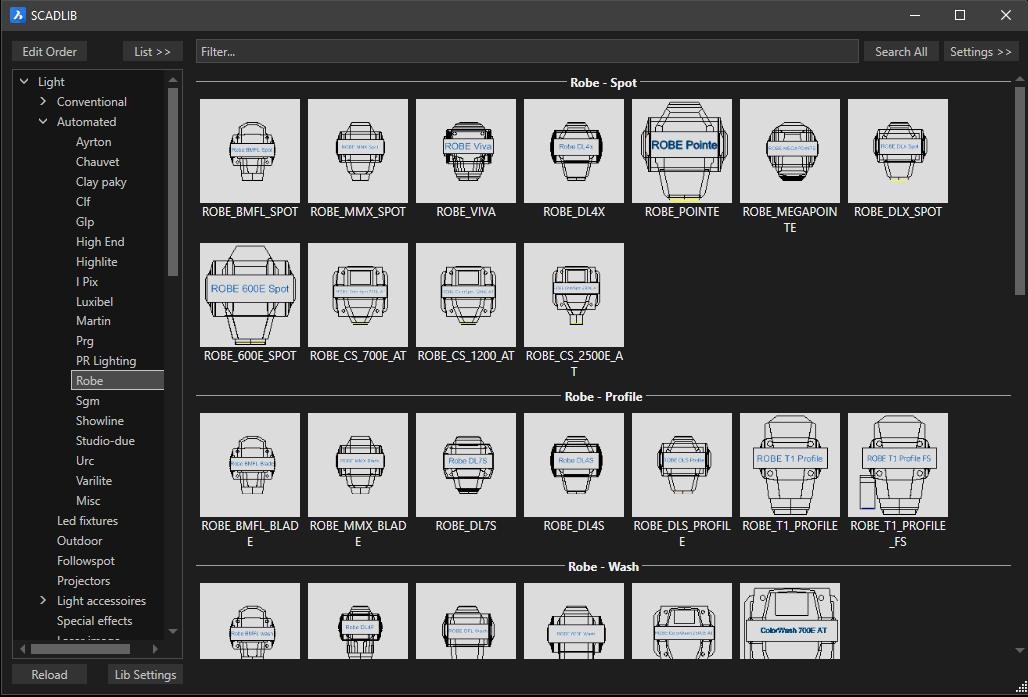
The list on the left contains all blocks in this folder. The icons are separated by pages. You can switch to a page by clicking on the page button on the right. When holding the cursor on an itemd you can see some of the database details like wiehgt and power.
Click (or double click, depending on settings) on an item or click INSERT to insert the block. You will see a “preview” image of the block and you can click anywhere in the drawing to insert the block. But you can also rotate the block before inserting. You have the following options:

- Align (ctrl button). When pressing and holding the ctrl button you can rotate block dynamically. The rotating starts when pressing the ctrl and stops when releasing the ctrl button. Combine this with entity snaps to align the block exactly with existing items in the drawing before actual inserting it.
- Left (L [enter]). Rotates the block x degrees counter clock wise, as set by Set angle (last option).
- Right (F9 or R [enter]). Rotates clock wise.
- Angle (A [enter]). Asks for the rotation angle.
- REset (RE [enter]). Resets the rotation.
- Angle Dif (D [enter]). Asks for two angles and rotate the block the difference between these angles. This is mostly used with the move and copy commands, when the block is rotated already before moving or copying.
- X (X [enter]). Rotates the block 90 degrees about its original X-axis.
- Y (Y [enter]). You guessed it.
- FlipY (F [enter]). Reflect (mirror) the item on Y-zxis before inserting
Magnets
When inserting trusses you will notice the objects will snap to each other because of the magnets inside. When you insert an object you can switch between the magnet with the N option (Next magnet).
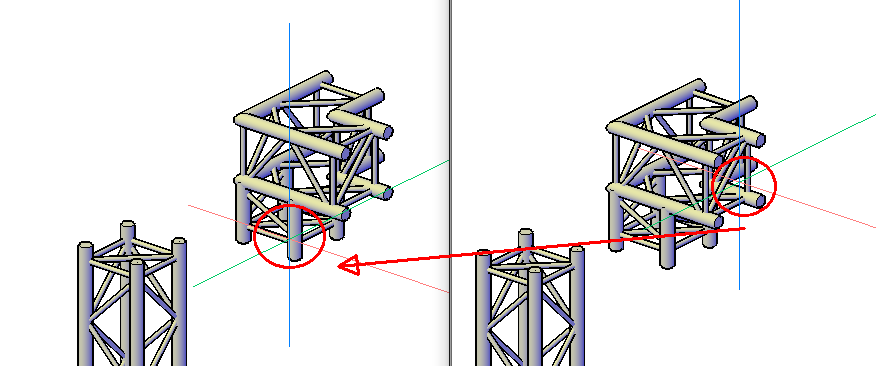
Just type n [enter]. When inserting the object for next magnet.