Setup SCAD Re-Event (ENG)
Normally, SCAD Re-Event will immediately have all the settings right after installation. Sometimes the settings are not optimal, for example because old settings have been taken over that no longer work properly, or because SCAD Re-Event is installed under a different account. Below an explanation of how everything can be set with the default values.
Menu
The menu determines which icons are displayed in which place and what the ribbon looks like.

The default menu is in c: \ scad-rev \ menu and is called something like SCAD Re-Event V7.cui . Set it with the command CUI .
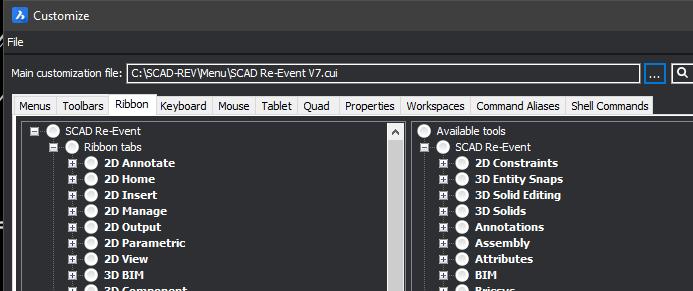
Click on the dots after the name of the file at the top to load another menu file.
Workspace
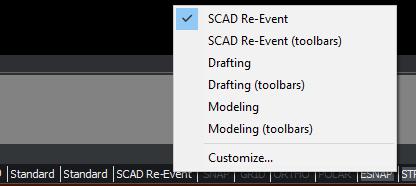
After loading the menu, the workspace must still be set correctly, click at the bottom of the screen with the right button on the name of the workspace and select the SCAD Re-Event workspace:
Support Path
SCAD Re-Event looks for some files in the c: \ scad-rev \ support folder. To ensure that these files can be found, this folder must be in the list of support paths. Click Settings in the pulldown menu or type SETTINGS.
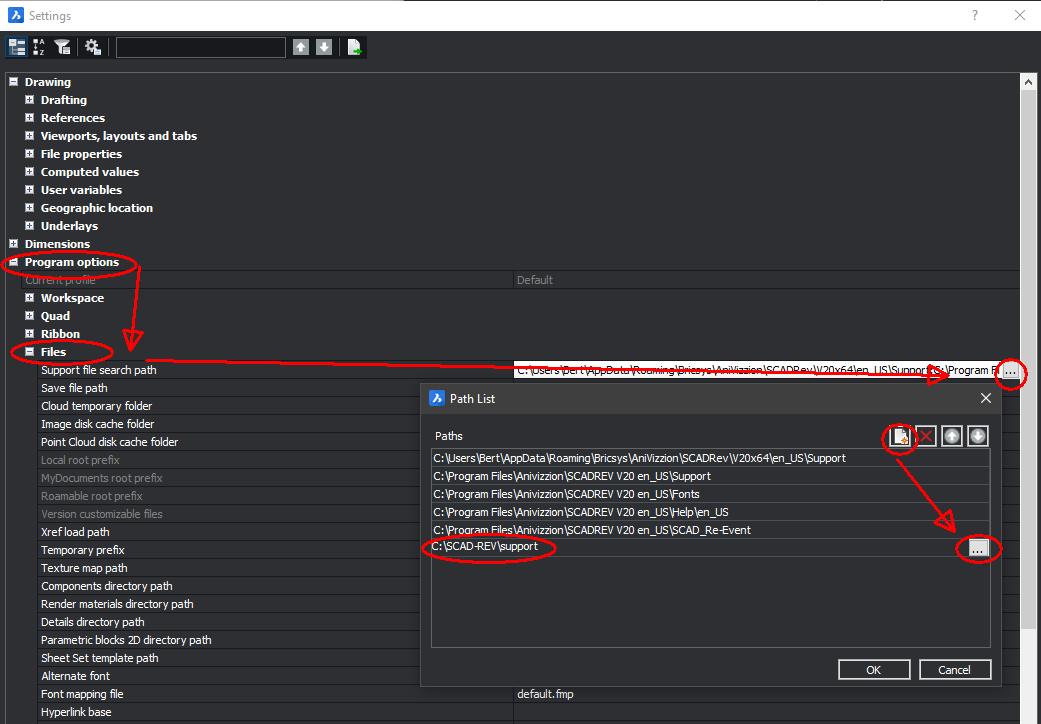
The rest of the paths may remain, they may differ from the picture, which is due to the version of SCAD Re-Event.
Template
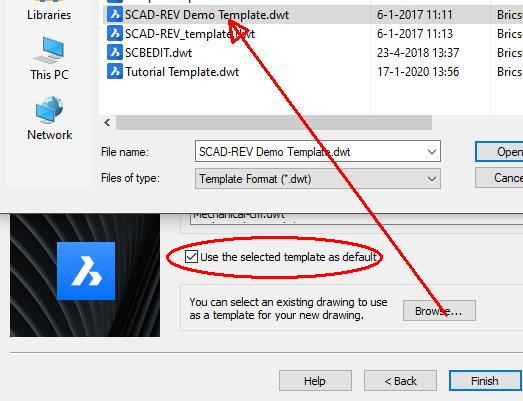
SCAD Re-Event normally starts with an empty sample drawing. The intention is that you customize it with your own logo and so on. To ensure that the correct template is loaded at startup Go to pulldown menu File> New wizard.
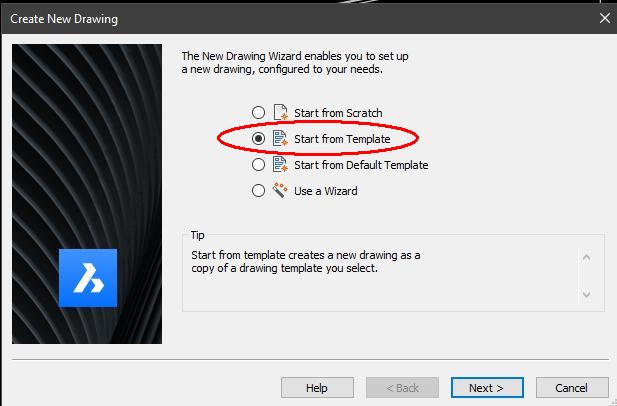
Then click Browse and select SCAD Re-Event demo template from the folder c: \ scad-rev \ dwt or choose your own DWT.
Library settings (SETLIB)
Type SETLIB and set the settings as follows:
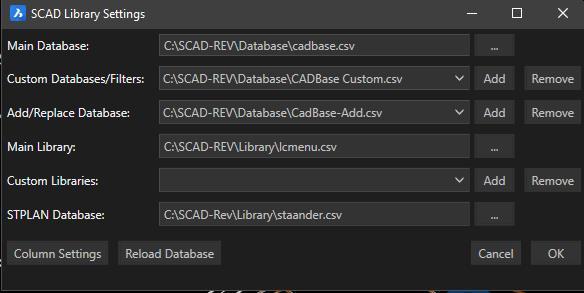
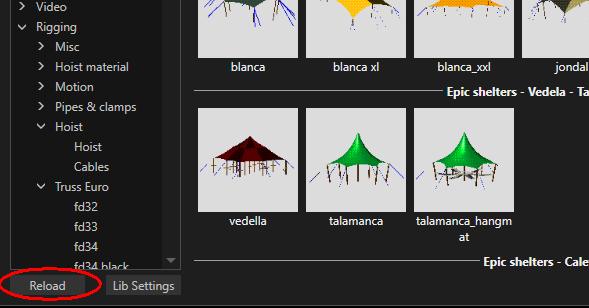
Then click Reload in SCADLIB.
Selection settings (SCADSELSETTINGS)
The default way in which SCAD Re-Event selects objects can be set with the command SCADSELSETTINGS . The settings that are set are:
| Name | Default value | Description |
|---|---|---|
| Pickadd | 0 | When clicking on an object, only that one object is selected, if there was already a previous selection, it will be emptied |
| Pickdrag | 1 | Pressing the left mouse button gives a selection window. If it is at 0, just clicking is enough |
| Selection preview | 2 | Objects do not light up when the cursor is over them. This slows down with large objects and is therefore off |
| Highlight Effect | 1 | The selection shows as a color (instead of dotted lines) |
| Highlightcolor | 6 | The selection color is magenta by default |
| Cursorsize | 99 | Length of cursor lines, 10 is also a commonly used value |
Each of these settings is available as a command, so it is easy to change. If necessary, open the SETTINGS menu and search on these names to see all the options.